Fifteen Year Challenge for Finer Polymer Photogravure Prints

When I first put my procedure for making and printing polymer photogravure plates online in 2006, it was after a few years of my own frustrations in the process. I posted it in response to a lack of comprehensive information about the subject as it pertained to creating continuous tone images for photography. The traditional printmakers weren’t concerned with it, and the computer nerds (of which I am one) didn’t have any meaningful elbow grease or track record when it came to making traditional intaglio prints.
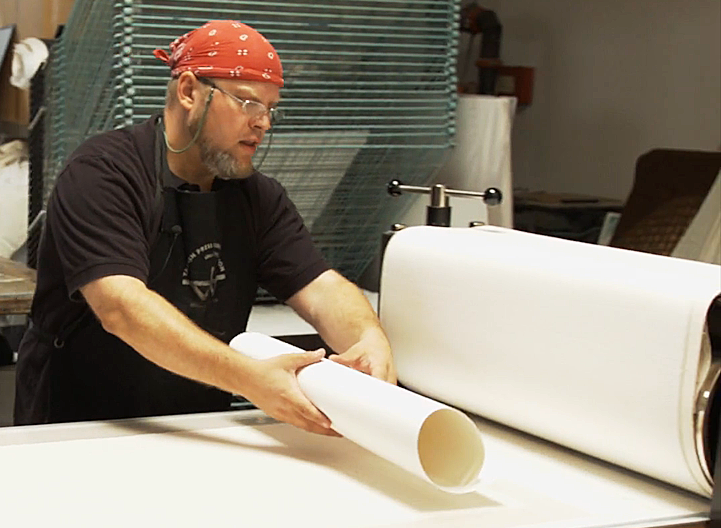
Jon Lybrook, Master Printmaker, Intaglio Editions
Jon Lybrook, Owner and Master Printmaker, Intaglio Editions

Picking up where others’ work had left off, I created a custom workflow and process compensation curve to accommodate a finer, higher-resolution aquatint screen than anyone else was using at the time. Our screen is 2-3 times as fine as traditional rosin dust used for aquatinting copper photogravure plates. At 1200 dpi, our fine, third-generation, heavy-duty aquatint screens with custom stochastic pattern are a double-edged sword. We don’t sell them to the public because they are less forgiving than coarser screening processes, but yield superior, fine continuous tones for photogravure when handled and used under a controlled environment using the tried-and-true KM73/83 plates by Toyobo, for which our screens and system for making continuous tone plates was designed.

While excellent technical books on polymer platemaking and creating digital negatives for contact printing are now available, there were but a few good ones in 2004. The only one most of us referenced was written by digital negative pioneer and process wizard Dan Burkholder. Today, faster methods to getting inkjet-quality photogravure prints from polymer, such as Direct-to-Plate (as taught by printmaking instructor Don Messic) and reliable, open-source software for calibrating your printer drivers for making custom digital negatives now exist.

While direct-to-plate (DTP) is easier and faster to teach polymer plate making certainly, it does not employ a critical, secondary aquatint layer to create the proper plate texture and variable depths. This is what gives photogravure its unique 3D qualities, otherwise you’re just printing a flat inkjet print that’s been transferred flatly to a plate. This critical aspect of plate depth and ink relief is among the most apparent qualities in traditional photogravure prints – when made on on finer, Asian, gampi papers, in particular. While hard to demonstrate in a digital image, the look of a traditional copper plate photogravure, when executed properly, is unmistakable.
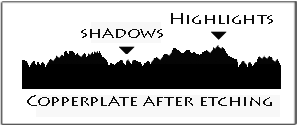
Cross-section of photogravure plate
Illustration by Peter Miller

While DYI is all the rage, some artists need an experienced, dedicated technical collaborator who understands their goals. Finding someone who has an intimate knowledge of the photo mechanical process as well as intaglio printing itself, is still the same today as it was 150 years ago. Finding such an experienced artisan is certainly harder than it was way back then.
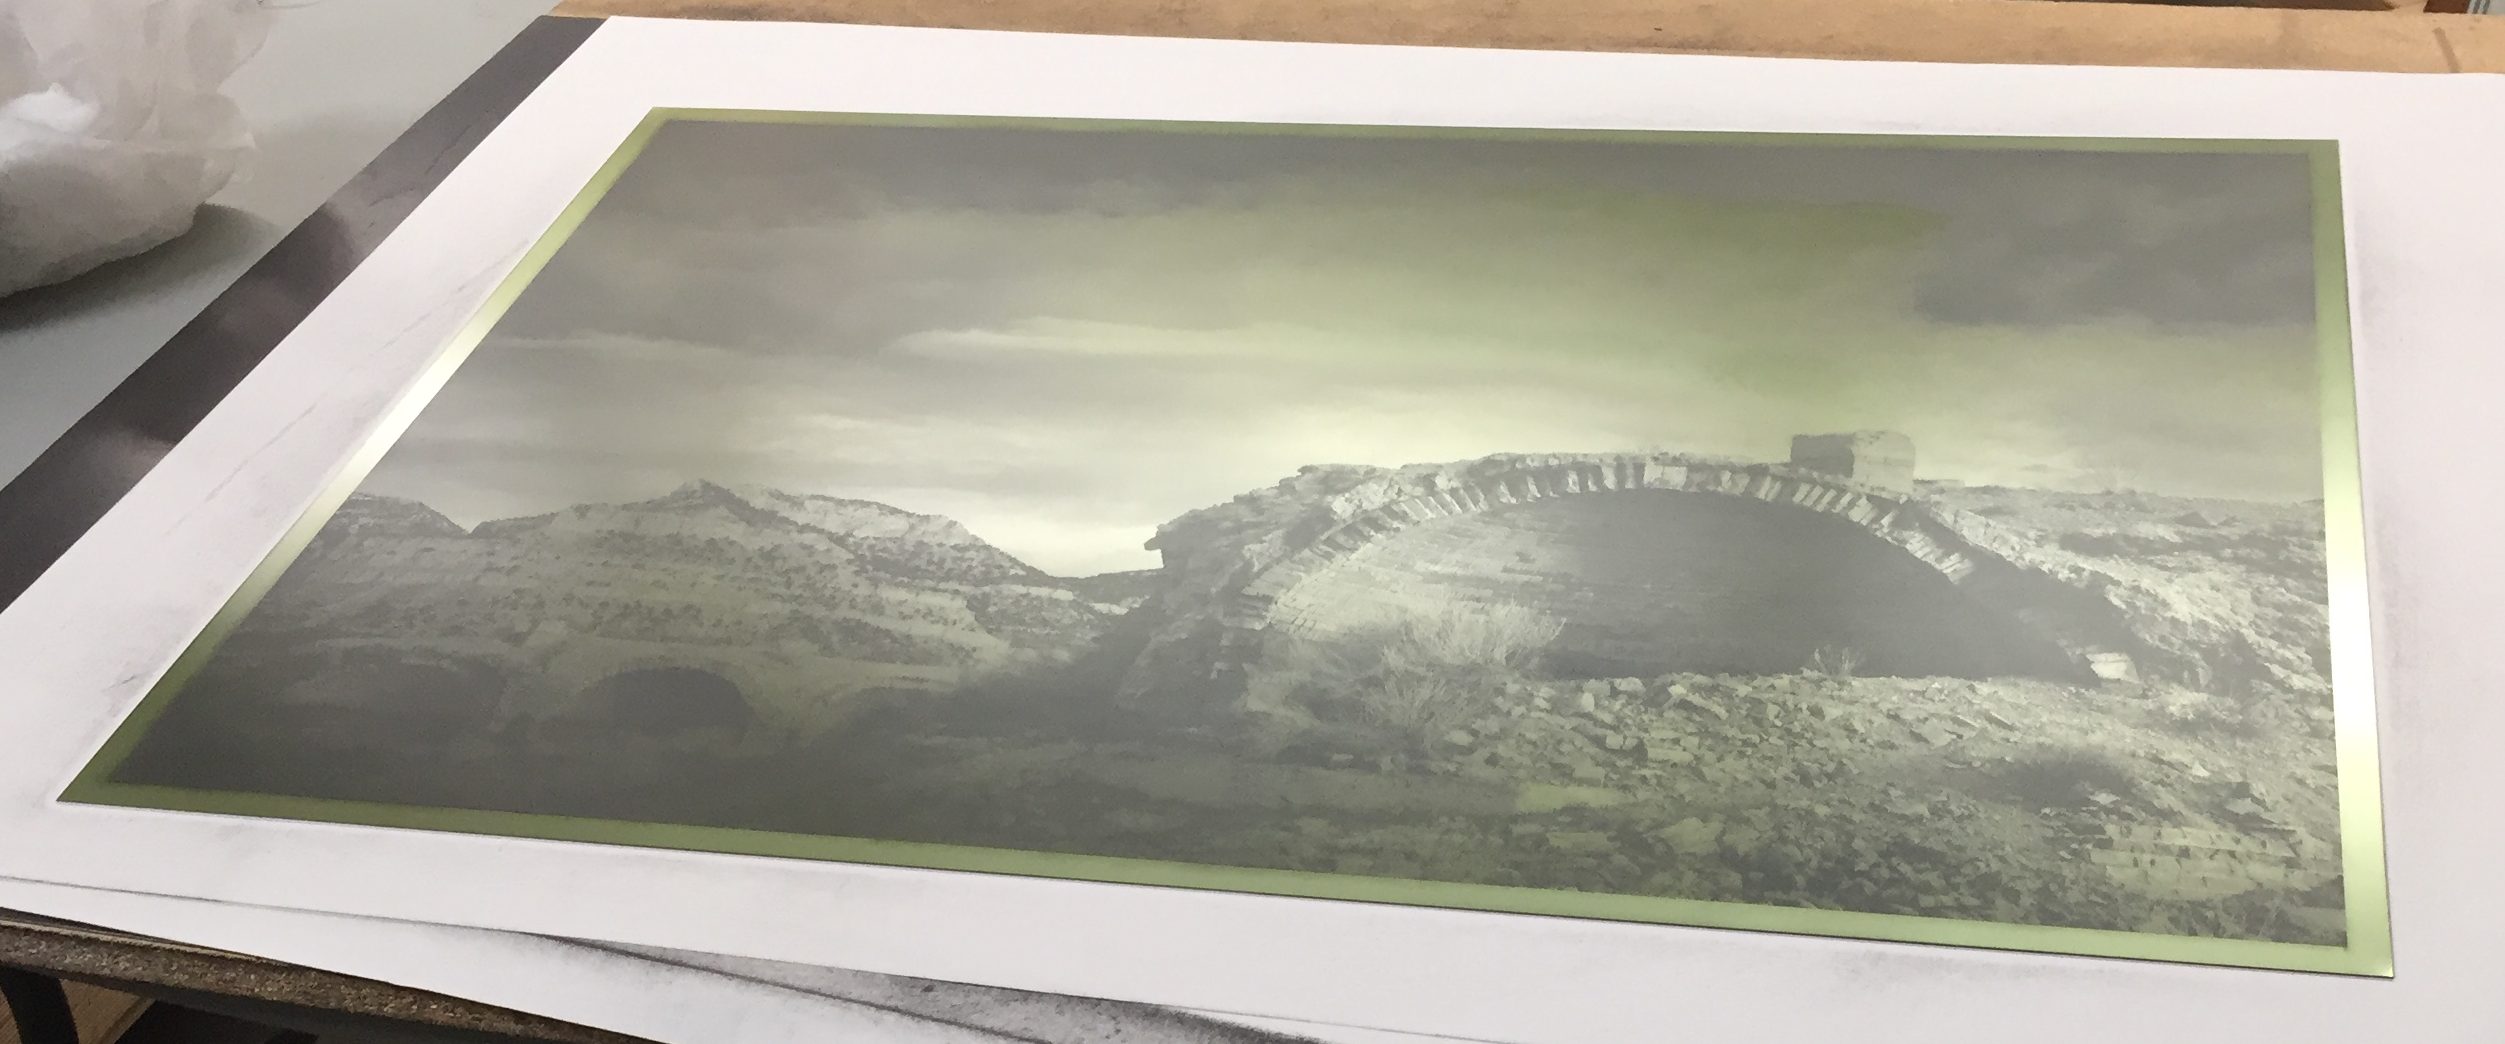
Intaglio Editions 20 x 30" large plate
Intaglio Editions 20 x 30″ large plate

As far as process and workflow, not much has changed at Intaglio Editions in our 15 years working with artists, clients, and their collaborators. We still create custom plates to meet client specifications including plates crafted for a specific ink color. In proofing the work with the client to refine the nuances and going back to the digital file and reshooting plates as needed, we have been able to provide the optimal prints our clients demand for their fine art projects. What has changed since the early 2000s is our ability to branch out into new territory, following the traditional processes, bringing the use of polymer even closer to the look (and literal feel) of traditional copper photogravure, without the added toxicity and expense.

Isabel Eaton - Polymer Photogravre printed ca. 2009 by Jon Lybrook
Isabel Eaton – Polymer Photogravre printed 2006 by Jon Lybrook

What makes Intaglio Editions Premium Photogravure Plates different is our custom, high-resolution aquatinting process, and our ability to offer extra large pre-made plates up to 23″ × 39″ (among the largest commercially available). While other methods are limited in size and often leave tell-tale “salt-and-pepper” grain in their photogravures, our traditional double-exposure method creates a more authentically etched plate and print, but at a price. It is more time-consuming and requires more steps and attention to detail than other methods.

So why do we do it? This extra work our process requires follows closer to traditional platemaking methods and gives our custom plates the edge, literally. Unlike newer plate processes, the surface of our plates have detail and textures can be felt by the fingertips. This demonstrates how we provide the smoothest continuous tones possible with this process more in keeping with traditional photogravure plates. Our plates and prints have been praised by artists, photographers and printmaking experts worldwide for their fine nuances, smooth tones, and shadow detail.

Intaglio Editions continues to offer the photogravure-quality plates we use in our printmaking to professional artists and printmakers who love making rich, photographic prints, but who may not be interested in becoming expert platemakers as well. This helps our friends and customers get faster results, and helps them achieve that last stride of excellence that so often eludes newer plate makers, or those new to photogravure printmaking.

New and experienced printmakers alike may want to take advantage of our long-standing $99 Trial Plate offer. We’ll create an 8″ × 11″ plate of your custom image using our custom, double-screened, high-rez platemaking method for just $99, to see if our plates don’t provide the smoothest, richest continuous tones you’ve ever seen from this process. Shipping, handling and customs, duties, or other fees will apply. Our Premium Photogravure Plates and other customer services are available at the Intaglio Editions Shop.

Wiping and Printing a Polymer Photogravure Plate in 60 Seconds

Recent work with photographer Larry D. Hayden kept us hopping for a few days in August head.  Here’s a little video excerpt showing off Larry’s evocative work and how we printed it.


Newton Rings and Contact Problems

Contact Issues with polymer photogravure

Newton Rings and Contact problems between the film positive and plate cause these white patches in the print.

Hi Jon,

I’ve been making plates for several years for my photography work and have only recently started having a problem with those dreaded spots on the plate and subsequently the prints.  In researching the problem I came across your web page and it was the ONLY place I have seen a reference to these spots.  I tried you suggestion of drying the transparency and then did a small 4×5 transparency of the image on plate and it seemed okay, but then when I did an 8×10 transparency with the same process, the plate had the dots again.

Do you have any further advice about this problem with Pictorico film?  Or another film that might work without the problem.  It’s maddening and I’ve lost several days of work and lots of plates trying to resolve it with no luck.

I have some Sihl film I’ve never used and considering it.  Anyway, any help you could offer would be very appreciated.  I know Dan Welden and he says it’s a problem with Pictorico.  Is there a work around?

Thanks so much,

Jari Poulin


Hi Jari,

It is much easier to be successful with smaller plates. Larger plates have a learning curve all their own since it is a larger surface area, making tight, contiguous contact with the plate more difficult.

The problem of dark spots (which become white in the print) is typically a contact problem. In some cases it can be attributed to newton rings,. In most cases it is simply a lack of contiguous contact where the film is able to go out of focus and become diffuse in places, weakening the density in the plate in those specific areas.  

Newton rings can occur between the glass of the vacuum frame, and film – or between the film and the plate.  I avoid newton rings on top by using Kreene plastic instead of glass in my vacuum frame.

Two other solutions to avoiding newton rings with larger plates:

1. Pictorico now makes a textured film. The texture creates small cracks where air can escape, avoiding the newton ring issue on some level. 

2. The other solution is to apply baby powder finely to the plate and/or film positive prior to the second exposure to the plate. I use it sparingly, and remove as much as possible with a hake brush before putting in the vacuum frame.  It does the trick.

Hope that helps.  LMK if you have any further questions and best wishes for your project!

Jon Lybrook

Questions re Pictorico film for photogravure – also after using KREENE

I get a fair number of technical inquiries and tend to post some of the more interesting ones with common themes that plague many printmakers getting started in this process. The variables are seemingly endless and it only takes one inconsistency with the process to have undesirable results.

This one has to do with mottling in the plate, often referred to as ‘measles’. Generally it is caused by improper or insufficient contact between the film and plate, as is the case here.

Thanks to photographer and printmaker Lene Bennike for giving permission to publish our exchange in order to help others with similar problems.

Return-Path: contact /at/ lenebennike.com
Received: from csmtp2.one.com (csmtp2.one.com [91.198.169.22])
by terabear.com (MAILER-6 TERABEAR) with ESMTP id q0P7F4ZO009056
for jon /at/ intaglioeditions.com; Wed, 25 Jan 2012 00:15:05 -0700
Received: from [188.183.154.76] (unknown [188.183.154.76])
by csmtp2.one.com (Postfix) with ESMTPA id 1CDDD3017224
for jon /at/ intaglioeditions.com; Wed, 25 Jan 2012 07:14:57 +0000 (UTC)
From: Lene Bennike contact /at/ lenebennike.com
Content-Type: text/plain; charset=us-ascii
Subject: Questions re Pictorico film for photogravure - also after using KREENE
Date: Wed, 25 Jan 2012 08:14:55 +0100
Message-Id: BB80154D-5BAC-475F-A4CA-A85AD9DB691C@lenebennike.com
To: jon /at/ intaglioeditions.com


Hi Jon Lybrook,

I m a Danish fine art photographer and printmaker having used the polymer photogravure since 2006 after many years of doing platinum/palladium and cyanotypes. My reason for approaching you is the fact that we can no longer get image setters positive here in Denmark so I am again using the Pictorico OHPs. Like earlier I often encounter measles in the highlights and midtones something I have not been used when doing other alternative techniques. However, searching the internet I came across your advice of using Kreene plastic instead of glass and got some Kreene from Boxcar Press. But after testing twice I still get the same result of measles. The plates we are using here are the KM73. Have you any idea of what could be the problem?

Thanks in advance for any suggestion that might solve this.

Best regards,

Lene


On Jan 27, 2012, at 6:20 PM, Jon Lybrook wrote:
HI Lene,

Thanks for your message. Sorry to hear about the measles.

Are you drying your inkjet film in a warm film drying and dusting your
plate with baby powder per my procedure? That step should be performed
whenever exposing the plate using inkjet film such as Pictorico. The
film has a tendency to retain moisture. By drying it in a conventional
print drier to remove the moisture you remove some of its tacky quality.
Likewise the light dusting of baby powder on the plate allows the film
to slide smoothly over the plate when drawing down in the vacuum frame,
helping to give tight, continuous contact between the plate and film.

Feel free to send me a scan of one of your prints so I can better see
what you’re talking about.

Kind regards,
Jon


Hi Jon,

Thanks a lot for your reply.
Yes, I m usually drying the film about 10-20 min in a warm film/plate drying cabinet and the baby powder I have been using for a long time.
But I must admit that when testing the Kreene by exposing the attached steptablet I forgot to dry the film – probably because it is an old one having been dried earlier.

By searching on the internet I have come across info about the new Pictorico ohp films having a tendency to give more problems – could this be correct? It is a fact that the Pictoricos are much thicker than image setter positives. Have you tried other films?

Below is Lene’s scan of her printed test:

Polymer Photogravure Test: Measles

Mottling on Lene’s Polymer Gravure Test Plate


On Jan 31, 2012, at 3:11 PM, Jon Lybrook wrote:

Hi Lene,

What light source are you using for making your plate exposures? I used to use black light bulbs and had some weird inconsistencies in the continuity until I started using a OLEC metal halide light source with a bulb suited for polymer plates.

What are you using for an aquatint screen?

Imagesetter film doesn’t have as many issues as inkjet film and doesn’t require drying or baby powder. I’ve experimented with many inkjet films in the past. Pictorico works, so I continue to use it and have not looked back since I started using it.

I’m using the new version of the Pictorico OHP Premium (not ULTRA which is milkier and more opaque) and have had no big problems with the transition.
I think I had to increase my exposure times by 25%. The new version of the OHP Premium film is actually thinner than what they were producing a few years ago. There is a version of the Pictorico that has a texture on the surface which supposedly makes it so one does not have to dust with baby powder. I haven’t tried it.

Also, do you mind if I publish our Q&A on my website? Others may find it helpful.


Hi Jon,

At the printmaking studio where I do my work they have the following lamp: a Philips HPR 125W HG – a Mercury Discharge Reprographic Source – http://www.lamptech.co.uk/Spec%20Sheets/Philips%20HPR125.htm

The aquatint screen is 85% black 30 my (reprofilm)

The Pictorico I have been using for many years is the TPU100, but they have become slightly thinner over the years. On the new packages which I got from Bostick & Sullivan recently it says PictoricoPro, but item no remains the same.

Can I gather that the measles on the image I sent you recently is due to moisture in the old film? I m asking since will be away for a while working in a printmakers studio in Paris and no means to do photogravure there.

Yes, you may go ahead and publish our Q&A on your website.

Thanks,

Lene


On Feb 2, 2012, at 7:03 PM, Jon Lybrook wrote:

Hi Lene,

OK. This is good info.

Looking closer at your sample test, I’m inclined to believe you have a contact issue with your film positive. I notice the percentages listed where the measles occur more prominently are slightly out of focus, which would suggest less than perfect contact. Look at 38% and compare it to 50% in terms of the relative sharpness. Likewise compare 96% to 100%. The perimeter is fuzzy. The perimeter is also where the majority of the mottling exists.

Polymer Photogravure Test: Measles

Mottling on Lene’s Polymer Gravure Test Plate

Before and after starting the vacuum pump to initiate drawdown of the kreene plastic on your vacuum frame, you will want to use a flexowand
(http://www.jetusa.com/prepress1.html) or dry, lint-free rag to push out any bubbles from under the kreene. Push as much air as you can from one edge of the vacuum frame to the other before starting the pump, then after starting the pump, move quickly to ensure tight contact. The flexowand will allow you to see if any air gets pushed up against the kreene plastic which should dissipate.

For optimal contact, the size of your transparency should not be bigger than the plate.

You should see and feel a sharp lip where the edge of your plate meets the kreene plastic. If it looks uniform on the surface of the kreene or there is not a defined edge you can feel with your hands, the contact is likely inadequate.

If after about a minute you still find a lot of air bubbles are getting pushed around with the flexowand, stop the pump, open the vacuum frame, adjust your plate and transparency slightly, close the lid and repeat the above instructions.

Let me know if that helps and good luck!

Jon


Hi Jon,

Thanks so much for your info.

Can I just ask you one more relevant question re the vacuum frame or more precisely the vacuum pressure that you are using?

Lene


On Sat 2/4/2012 10:49 AM Jon Lybrook wrote:

Hi Lene,

Yes, of course. Pressure is drawn down steadily to the maximum pressure I can get to help ensure no air bubbles. With Kreene replacing the glass you can’t really go too high — I’ve not experienced that in any case.

Best wishes,
Jon